
Materials needed
3/4" elastic
2 or 3 color coordinating fabrics (see size for amount of fabric needed)
matching thread
Sizing
6-12 months
(1)4” wide x 23” long waist band
(2)4” wide x 33” long mid section
(2) 3” wide x 33” long bottom band
12-18 months
(1)4” wide x 25” long waist band
(2)4.5” wide x 35” long mid section
(2) 3.5” wide x 35” long bottom band
18-24 months
(1)4.5” wide x 26” long waist band
(2)5” wide x 36” long mid section
(2) 4” wide x 36” long bottom band
2T
(1)5” wide x 27” long waist band
(2)6” wide x 37” long mid section
(2) 4” wide x 37” long bottom band
3T
(1)5.5” wide x 29” long waist band
(2)6.5” wide x 39” long mid section
(2) 4.5” wide x 39” long bottom band
4T
(1)6” wide x 30” long waist band
(2)6.5” wide x 40” long mid section
(2) 5” wide x 40” long bottom band
Size 5 Girls
(1)6” wide x 31” long waist band
(2)9” wide x 41” long mid section
(2) 5” wide x 41” long bottom band
Size 6 Girls
(1)6” wide x 32” long waist band
(2)10” wide x 42” long mid section
(2) 6” wide x 42” long bottom band
Size 7 Girls
(1)7” wide x 33” long waist band
(2)11.5” wide x 43” long mid section
(2) 6” wide x 43” long bottom band
Size 8 Girls
(1)7” wide x 34” long waist band
(2)13.5” wide x 45” long midsection
(2)6” wide x 45” long bottom band
1. Cut top band, mid section, and bottom band to desired size.

Serge or zig zag the sides of all peices.
2. Sew side seams of top band together right sides facing each other.
Sew mid section side seams together right sides facing each other.
Sew bottom section side seams together right sides facing each other.
 Press all side seams open.
3. Fold the bottom band in half width wise, and press.
Pin bottom band on to the bottom of the mid section band.
Sew using a 5/8 seam allowance.
 Serge or zig zag.
4. Press one of the edges of the top band under ½”.
(ignore the fold on the bottom)

Press over again 1”. (total 1.5”)

Sew 1/8” from the pressed edge leaving a 1” opening by one of the side seams.

5. Change your stitch length to 4 on your sewing machine. Sew a 5/8” seam on the top of the mid section- DO NOT BACK STITCH.

Sew again placing the 5/8” stitching along the left side of your presser foot. You will have 2 sewn seams parallel to each other.

Pull both strings on the same side gently, easing the fabric along the thread creating the “gathered” look. Ease it until it is the same size as the top band.
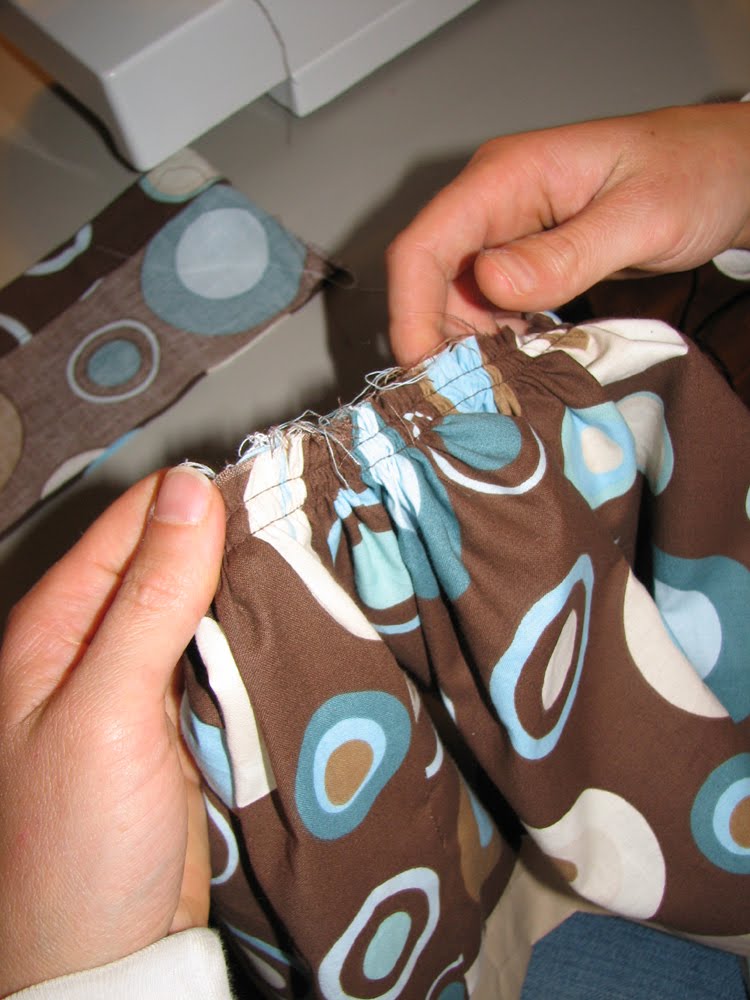
Pin in place, gathering as needed to fit. Sew in between both stitches with stitch length 2.2 or 2.5, making sure you don’t make any puckers. If you do make puckers take that section out and re sew in place, making sure you back stitch.

Take out the gathered stitches, making sure you don’t seam rip any of the permanent stitches.

6. Put a safety pin in one end of your elastic, and feed through the 1” hole of the waist, feeding the elastic through to the size you need. Back stitch 3-4 times. Cut elastic leaving 1” for easy adjustment.

7. Press the gathered seam, and the bottom band and you are done!

This tutorial is for personal use only. It may not be used to make items for retail, commercial,or any other type of sale.
Thank you for respecting my request.
I hope you have fun sewing! Karen

3 comments:
The tutorial looks great and so does the skirt I have from this pattern. It suits our little girl wonderfully! Thanks for making it.
I'm saving this tutorial - it's on my list of things to work on!!!
The skirt is gorgeous - thanks for sharing.
This is a great skirt tutorial. Would you be interested in guest posting it on my blog? Send me an e-mail if you are: SpunkyDiva@live.com.
~Kimberlee
www.TheSpunkyDiva.blogspot.com
Post a Comment